Generate a schedule
Generate a schedule
Generate a new schedule for an empty month or regenerate an existing schedule when details need to change.
When the Admin console settings are configured, you can generate a schedule.
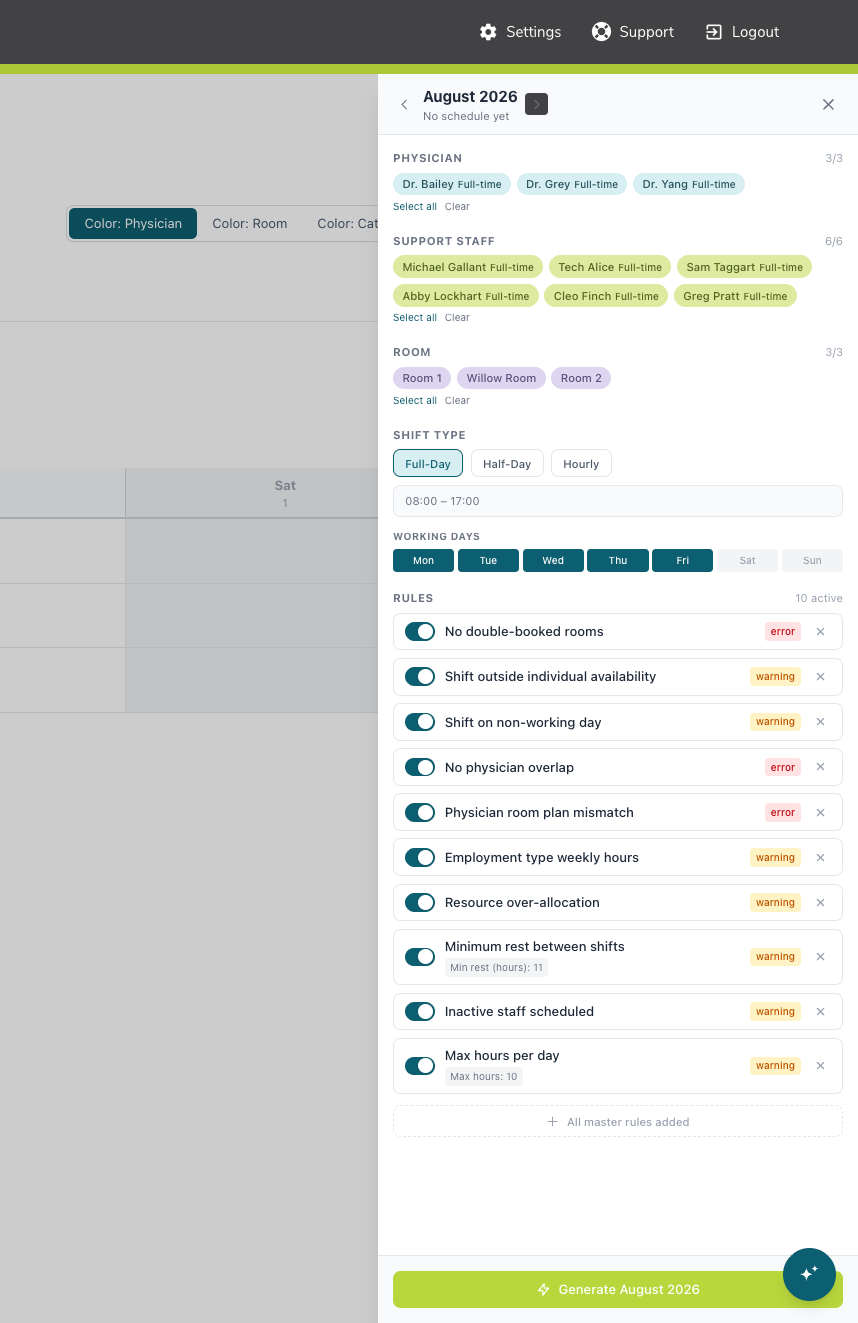
- Click the green Schedule button in the top-right corner.
- The Schedule panel opens.
- At the top of the panel, use the month arrows to navigate to the month you want to schedule.
If a month has not been generated yet, the panel will show No schedule yet.
Choose What to Include
In the Schedule panel, review and select the items you want to include in the schedule.
You can configure:
- Physicians
- Support Staff
- Rooms
- Equipment
- Shift setting
- Rules. Changes made here are treated as month-specific overrides. They apply to the selected month and do not replace the master rules in Rule Settings.
Each section includes Select all and Clear options to help you quickly update your selections.
Generate the Schedule
When everything looks correct, click Generate [Month] at the bottom of the panel.
The scheduler will build the month, and the calendar will fill in with the generated schedule. You can Accept or Regenerate.
Regenerate a Schedule
You can regenerate a schedule for a month that already has one. When a schedule already exists, the Schedule panel shows:
- The shift count
- An Accepted status
To regenerate the schedule:
- Open the Schedule panel for the month.
- Adjust any staff, room, equipment, shift, or rule selections you want to change.
- Click Regenerate [Month] at the bottom of the panel.
The scheduler will rebuild the schedule using your updated selections.
Discard a Schedule
To remove the current schedule for the selected month, click Discard Schedule.
This clears the existing schedule so you can start fresh.